Health & Wellness December Newsletter
Welcome to our Health & Wellness Community! Our expert staff shares their knowledge and experience, providing you with the latest nutritional tips, recipes, stretches and exercise classes to support your health journey.
Trainer Recipe Corner
High-Protein Gingerbread Cookies
Crunchy gingerbread cookies that are lower in calories and higher in protein than your typical cookies, but without sacrificing any of the flavors!
Ingredients
- 45g (1.5 Scoops) Snickerdoodle or Vanilla PEScience Protein Powder Or Comparable Whey/Casein Blend Protein
- 100g Oat Flour
- 28g Almond Flour
- 1 tsp Cinnamon
- 1 tsp Ground Ginger
- 1/4 tsp Nutmeg
- 1/4 tsp Baking Soda
- 30g Granular Sugar Substitute
- 2 Tbsp Molasses Can Be Swapped For Maple Syrup, But Molasses Give Gingerbread Their Signature Flavor
- 42g Light Butter I Use Country Crock Spread
- 1 tsp Vanilla Extract
- 1 Tbsp Milk of Choice
Instructions
- In a large bowl, combine all of the dry ingredients for your gingerbread cookies and mix it up until combined.
- Add the butter, molasses, vanilla extract, and tablespoon of milk, then mix up until it forms a thick cookie dough. Use your hands to bring everything together if needed.
- Refrigerate the dough for 1 hour. This chilling time makes the dough much easier to work with, and it will help ensure the cookies don't spread once baked.
- Once the dough has chilled, preheat your oven to 350 degrees F.
- Add your cookie dough to a flat surface and use a rolling pin to roll it out until flat (gingerbread only rises a very small amount, so roll out the dough as thick as you'd like your cookies). To roll out the dough, I prefer laying a sheet of parchment paper over the top while rolling to prevent sticking.
- Cut out as many gingerbread cookies as you can, peel away the excess dough, and carefully lift the gingerbread cookies onto a baking sheet. If you have a hard time picking them up, that just means you rolled the dough too thin and you'll want to re-form it to roll it out once more.
- Form the scraps back into a dough ball, roll that out, and cut out more cookies. Continue until you have used up all your dough. I was able to cut 12 gingerbread cookies out of my dough, but that may vary depending on the size/shape of your cookies.
- Bake the gingerbread cookies for 12 minutes.
- Remove the cookies from the oven and let them sit on a cooling rack for one hour to completely cool and firm up. These gingerbread cookies will harden the longer they sit, so if you find that one hour was not long enough, you can let them sit overnight or put them in the fridge to speed the process.
- Make a simple icing with powdered sugar & milk to decorate your gingerbread cookies, or use premade frosting in a piping bag.
Notes
The protein powder I use is a mix of whey & casein protein. If you use 100% whey protein, it will likely work for this recipe because it tends to lead to a crunchy result. See my full guide for protein powder substitutions for more. I highly recommend using PEScience if you can, especially the Snickerdoodle flavor for these cookies!
These gingerbread cookies will stay fresh for up to one week. Note that they will stay crunchy when left out. If they are stored in an airtight container they may soften up due to moisture retention.
If you find your cookies aren't crunchy enough, it is likely due to your cookies being too thick. In this case, you can bake your cookies for an extra 1-2 minutes to crisp them up and keep them stored in the fridge to fully harden.

Yield: 12 Cookies
Prep Time: 15 minutes
Cook Time: 12 minutes
Additional Time: 2 hours
Total Time: 2 hours 27 minutes
Nutrition Information
- Yield 12
- Serving Size 1 Cookie
- Amount Per Serving
- Calories 85
- Total Fat 3.5g
- Carbohydrates 9g
- Protein 5g
Nutrition in December
All Important Protein
By Renée Giese
Proteins serve many different important roles in the body, like binding parts together and facilitating movement, as well as digestion (enzymes) and immunity (antibodies).
We simply couldn’t exist without proteins!
Eating enough protein also plays a role in weight loss. It keeps us satiated, helps us to maintain muscle mass, and supports a healthy metabolism.
But getting enough protein can be difficult!
Here is a list of proteins that are easy and quick!
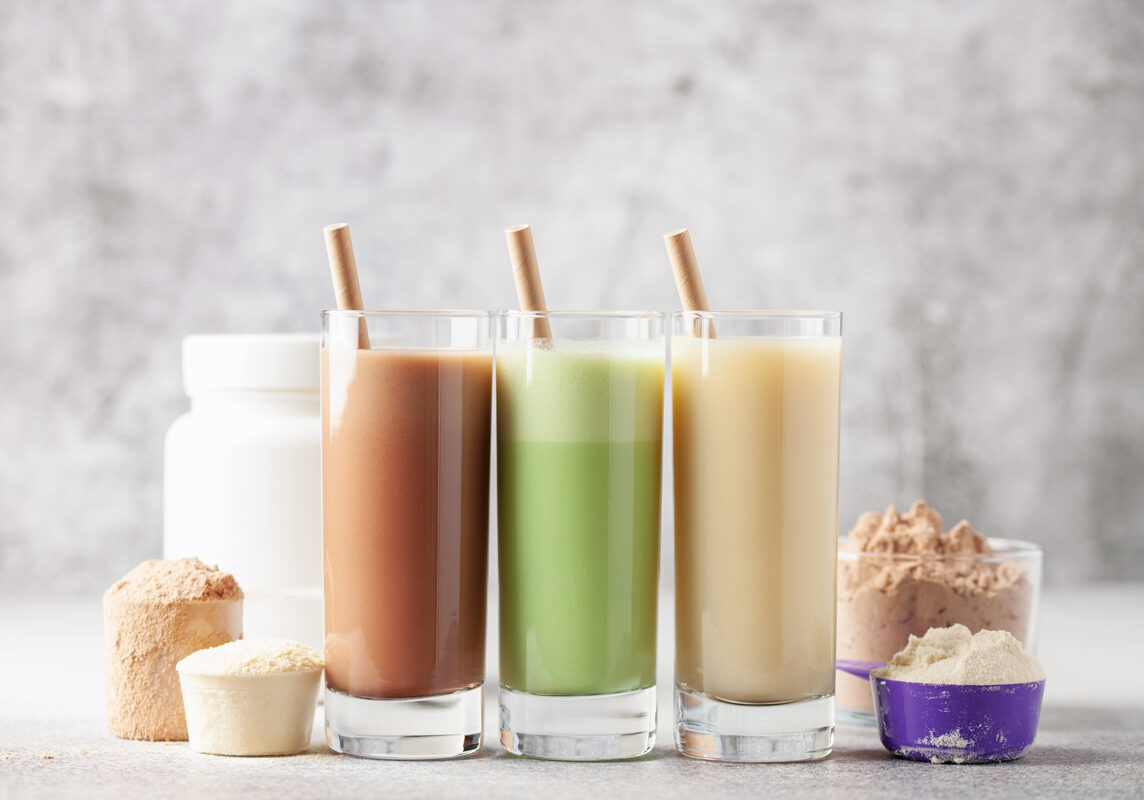
- Protein shakes: Find one that tastes good and have a shake with a piece of fruit as a snack! I like the Orgain brand.
- Protein bars: These can be deceiving! Check the nutritional information and be sure your protein bar has more protein than sugar! I like Pure Protein brand and Barebells brand.
- Fully cooked frozen meats: Easy to microwave and add to a salad or pasta dish
- Rotisserie Chicken: Season chicken in different ways to add to wraps, soups, salads and- it’s already cooked!
- Ground Beef: Keeps easy in the fridge and can be seasoned many different ways. Make taco meat to throw into a taco bowl or add some extra protein to your Mac and cheese!
- Tuna and Chicken Pouches: High in protein and so easy to grab and go. Pack with crackers or a small salad. Now available in some enticing flavors to keep things
- Turkey, Roast Beef or Ham Slices: Add to wraps, salads, or a quick protein packed rollup with a slice of cheese.
- Greek Yogurt: My personal favorite! I add to smoothies, or make parfait bowls with fruit and granola.
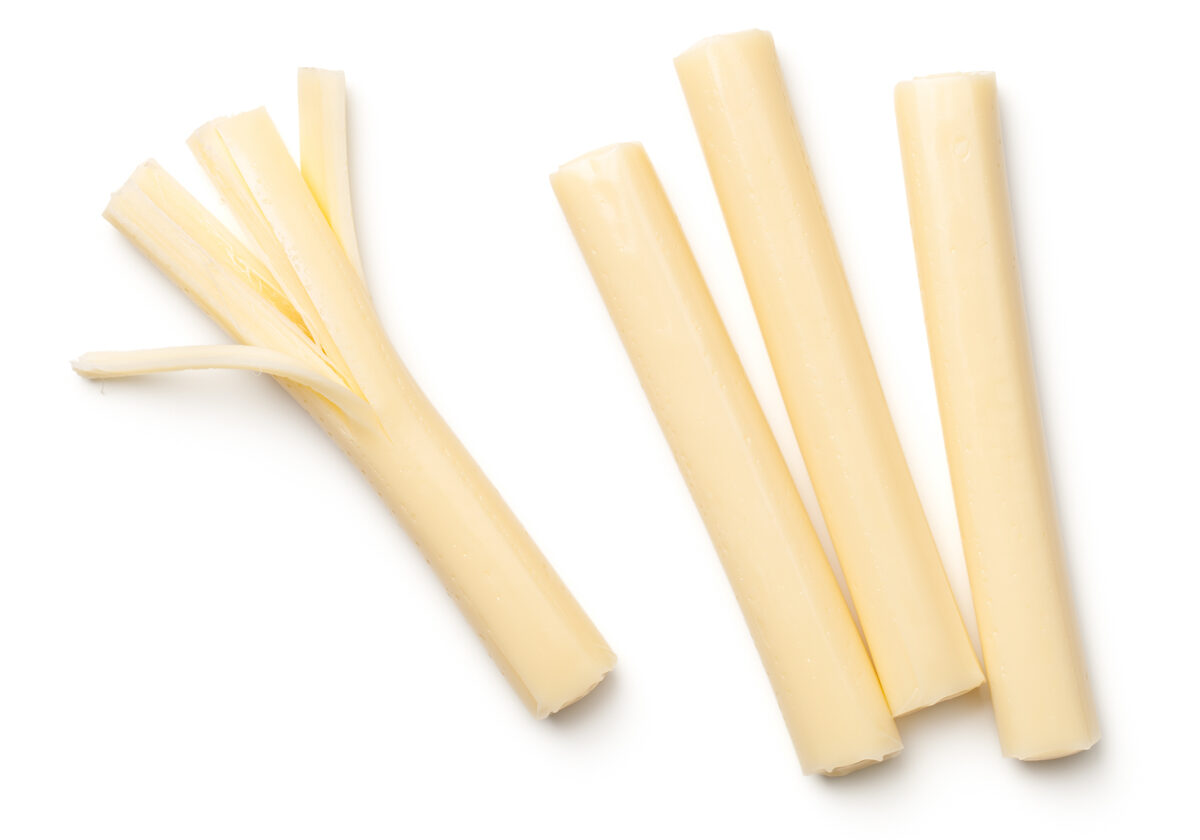
- Cheese: Easy, portable, and delicious! So many varieties includes cottage cheese and soft cheeses.
It is recommended to get .8-1g of protein per pound of lean body mass. If you’re not sure how much lean body mass you have, sign up to get on our InBody scale and find out more about your composition and dietary needs.
Trainer Recipe Corner
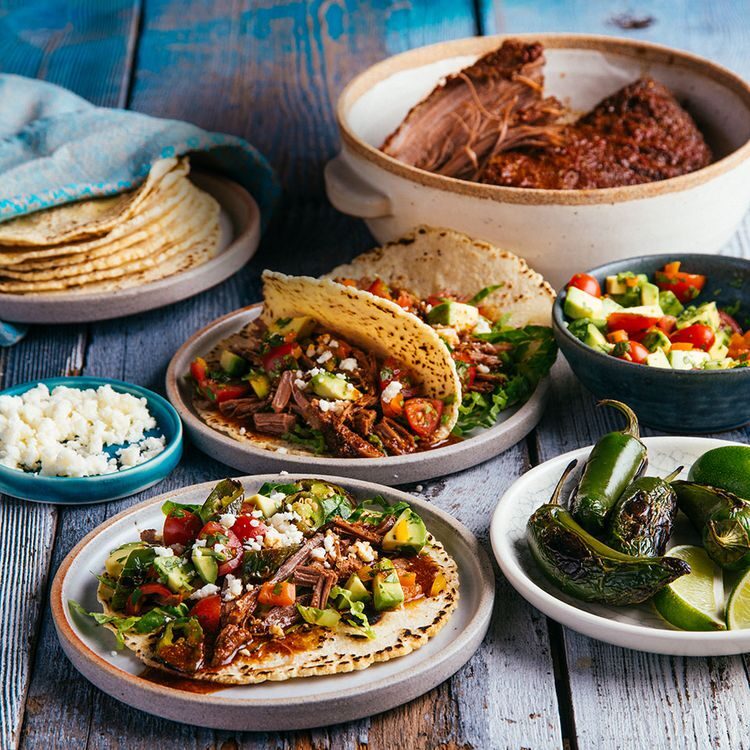
Slow-Cooker Carne Picada Tacos with Avocado Salsa
Ingredients
- 2 pounds beef brisket (flat end), trimmed
- 2 teaspoons ancho chile powder
- 2 teaspoons ground cumin
- 1 teaspoon salt
- ½ teaspoon dried oregano
- 1 cup water
- 2 tablespoons tomato paste
- 8 small jalapeño peppers
- 16 corn tortillas, warmed
- 2 cups thinly sliced romaine lettuce
- ½ cup crumbled cotija (see Tip) or feta cheese
Avocado Salsa
- 1 avocado,
- 1 cup chopped fresh cilantro
- 1 cup quartered grape tomatoes
- 2 mini sweet peppers, diced
- ½ jalapeño pepper, seeded and minced
- 1 ½ tablespoons lime juice
- ¼ teaspoon salt
Directions
Place brisket in a 4- to 7-quart slow cooker and sprinkle with chile powder, cumin, 1 teaspoon salt and oregano. Whisk water and tomato paste in a small bowl and add to the slow cooker. Cover and cook on Low for 8 hours or High for 4 hours.
About 20 minutes before serving, heat a medium skillet over medium-high heat. Add whole jalapeños and cover. Cook, shaking the pan occasionally and turning the jalapeños with tongs as needed, until charred and blistered on all sides, 10 to 12 minutes.
Remove from heat and let stand, covered, for 10 minutes to soften.
Meanwhile, prepare avocado salsa: Combine avocado, cilantro, tomatoes, sweet peppers, minced jalapeño, lime juice and salt in a medium bowl.
Transfer the brisket to a clean cutting board. Shred it, then finely chop. Slice the blistered jalapeños.
Serve the brisket in tortillas, with lettuce, the jalapeños, cheese and the salsa.
Personal Trainer Spotlight
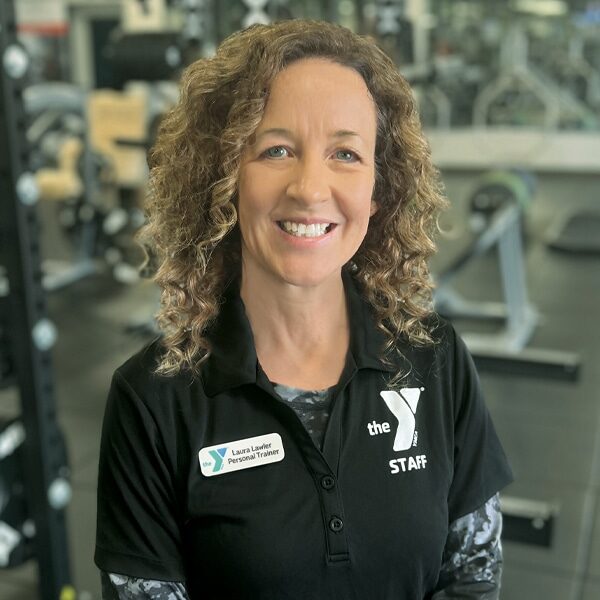
Get to know: Laura Lawler
“Courage doesn’t always roar. Sometimes courage is the quiet voice at the end of the day saying ‘I will try again tomorrow.”
I enjoy designing fun and varied workouts to challenge the body while safely improving overall strength and fitness.
Credentials
- NASM Certified Personal Trainer
- NASM Senior Fitness Specialist
- NASM Group Personal Training Specialist
- NASM Weight Loss Specialist
- Yoga Body Bootcamp Certified Instructor
I have a passion for helping my clients discover their own health and happiness through active living.
I began exercising regularly back in college to help cope with the stress of school. To my delight, I found that regular physical activity positively impacted every aspect of my life.
When my children were little, I discovered the wonderfully supportive community of the Y and I went from being a regular group exercise class attendee to a Group Exercise Instructor and Personal Trainer.
It is truly satisfying to observe my clients growing stronger and more confident with every workout.
New health & wellness program
Small Group Training
Season 3
In Small Group Training sessions, one trainer will work with four to a maximum of eight clients. Keeping the group to this size allows the trainer to personalize the trainings to the needs of the group members and allows the trainer to pay close attention to each client’s form so every member can progress safely.
What are the benefits of Small Group Training?
The benefits are numerous! Besides experiencing the expertise of a personal trainer at a fraction of the cost of one-on-one training, additional benefits include:
- Personalized workouts: the trainer will get to know the needs of each member of the group and will be able to adjust workouts accordingly
- Motivation: having others working with you encourages you to keep going
- Support: small groups get to know one another and provide accountability
- Enjoyment: working out with friends is simply fun, and when exercise is fun, adherence to it is so much easier!
Registration is Open - Spots are Limited!
Season 3: January 9 through February 15
- Each class is 45 minutes, twice a week, for 6 weeks.
- Classes include two InBody Biometric Scale evaluations, a $70 value. One at the beginning of the 6-week session and one at the end of the session. The InBody report will help the client and trainer personalize their trainings and set specific goals.
- Classes will include personalized guidance and nutrition support.
- The cost of each session is $79, for YMCA Members only.
Matt’s Stretch of the Month
The Hip Flexors
The hip flexors are a group of muscles along the front of the upper thigh. If you experience pain or tightness in your hip flexors, you are not alone! Tight hip flexors are extremely common in both active and sedentary individuals because these muscles will shorten and become tight from sitting for long periods, but they’ll also shorten and stiffen from physical activities such as running or biking, during which they are repeatedly required to lift the legs. Additionally, you might have tight and overworked hip flexors if your core or glute muscles are weak. Weakness in those areas causes the hip flexors to take on more of the work of spinal stabilization.
Tight hip flexors can lead to lower back pain and a whole host of other issues. You can help prevent or reduce tightness in your hip flexors by making sure you get up and move around regularly if you have a job that requires extended periods of sitting. Moving, stretching, or at least changing position every 30-45 minutes will help keep those hip flexors loose.
Here are some simple and effective stretches to help release tightness in your hip flexors. Hold each of these stretches for around 30 seconds, and repeat two or three times.
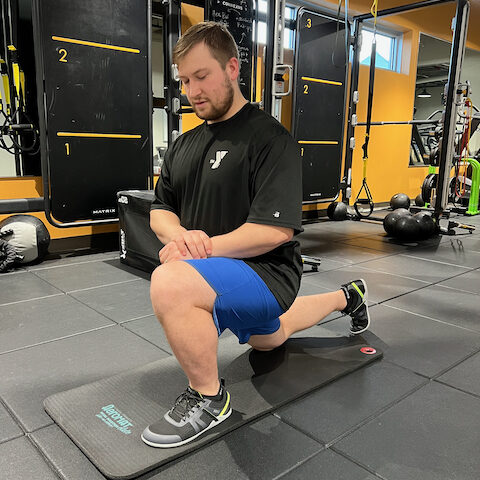
Half-kneeling hip flexor stretch:
Kneel on the floor and then bring one foot forward so that the front foot is flat on the ground and the thigh of the front leg is parallel to the floor. Tuck your pelvis, and with a long, straight back press your weight gently forward until you feel a stretch in the hip flexors and thigh of the leg in back. To deepen the stretch, raise the arm on the side of the back leg overhead and lean gently over to the side of the leg in front.
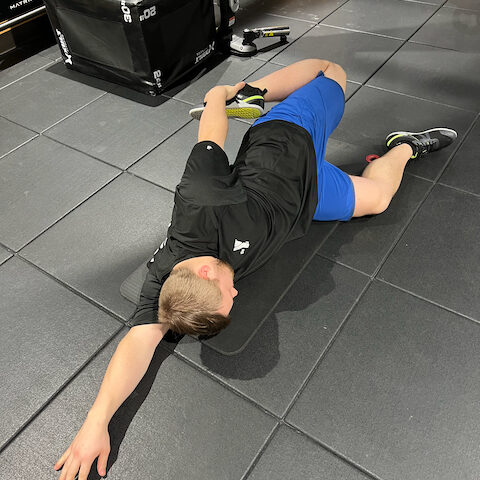
Side Lying Hip Flexor Stretch:
While lying on your side on the floor, bend both knees at 90 degree angles. Grab the foot of your top leg and gently pull it behind you toward your glutes, keeping your pelvis tucked so you won’t be arching your back. You will feel the stretch in the hip flexor and the front of your thigh muscles of the top leg.

